nav bar


Tuesday, November 30, 2010

cinnamon buns


Last night I was sitting and looking at my laundry list of recipes I have bookmarked to try, and one thing kept jumping out at me. I was intending to find something to make for dinner one night this week but the word "Cinnabon" kept yelling for my attention.

Now I know we're supposed to be shying away from all things sweet and indulgent since a major holiday weekend just past, but I had tilapia and vegetables last night for dinner so I deemed these an acceptable snack.

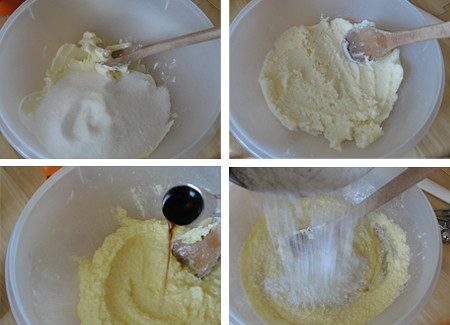
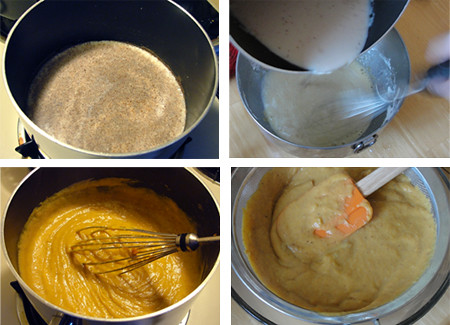
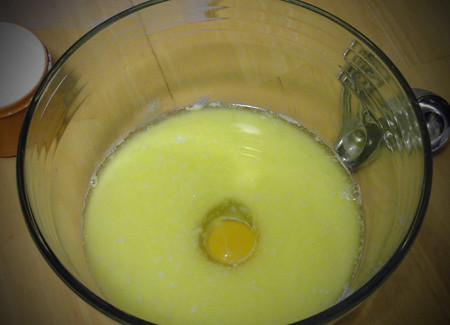
So grab your mixing bowl and let's go! Start by dissolving your yeast in the warm milk. Add the sugar, butter, eggs, and salt and mix. Then dump your flour on top.


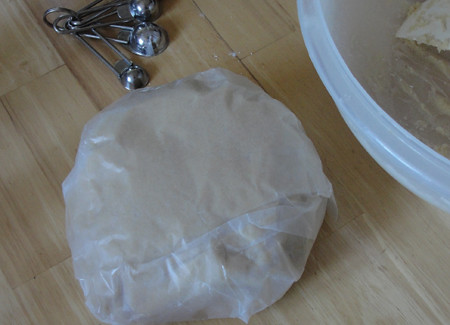
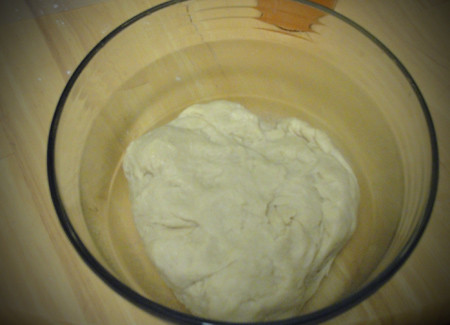
Knead the dough until its smooth and put it into a lightly greased bowl. Cover it with a clean tea towel and set somewhere warm until it doubles. (About an hour.)


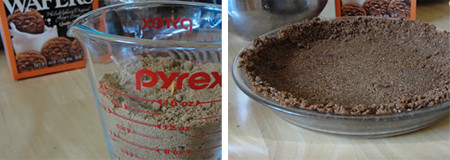
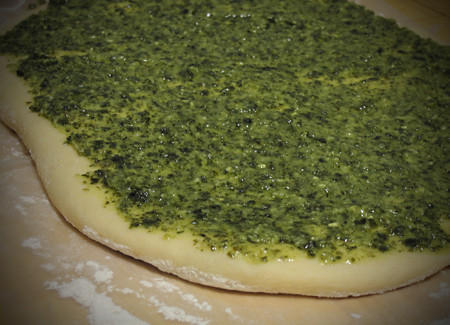
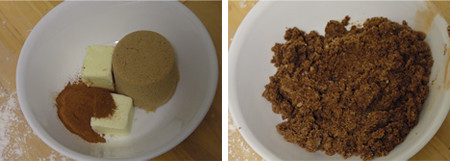
When the dough is doubled, mix the ingredients for your filling. Brown sugar, cinnamon, and butter. Yum. The mixture will be a bit crumbly looking.


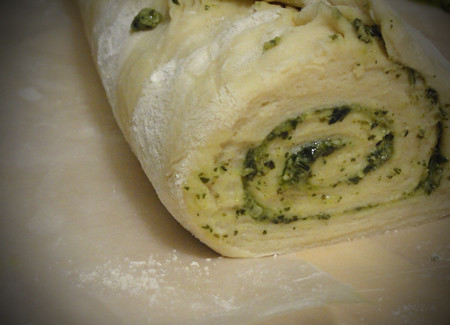
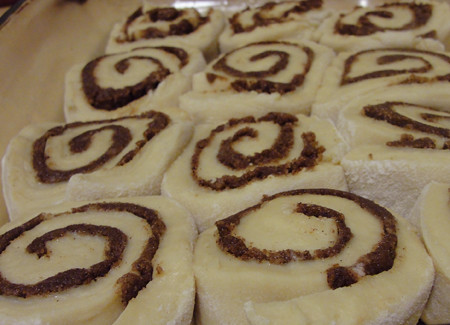
Roll out the dough on a floured surface and spread the filling all over, getting as close to the edges as you can. Roll up the dough lengthwise and begin cutting. Check out that swirl!


Cut into 12 equal rolls and place into a greased baking dish.


Let these sit covered one more time to rise (about 30 minutes). Then pop em in a preheated oven.

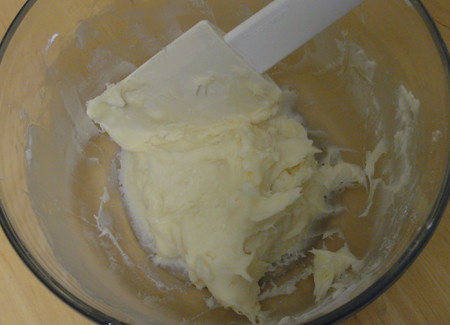
While these are baking, get your icing together. It doesn't look like a lot but I thought there was plenty. Then again I can only take sweetness in small amounts. You can double it though if they are not covered to your satisfaction.


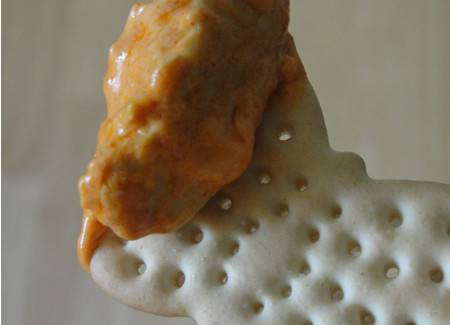
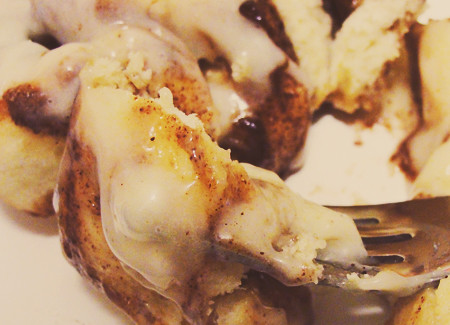
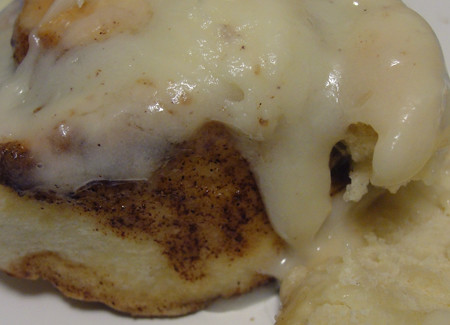
They look good enough to eat just like this! Spread the icing on while they're still warm so it can start to melt all over.


Cut one out and devour with a glass of cold milk.


Now it's been years since I've had Cinnabon so I'm really not the right person to say whether they taste like that or not, but once you try one, I doubt you'll care. They are that good. I actually ate one and a half. And I'm that person who eats the cake and leaves behind the icing. I'm weird, I know. Sweet stuff and I just don't get along that well. It may sound like a curse but most of the time it's a blessing. ;)

So whip these up and enjoy, but make sure there are a lot of people around to share with because it's easy to keep putting these in your face.


Cinnamon Buns
adapted from allrecipes.com

dough..
1 cup of warm milk
1 packet active dry yeast
2 eggs, room temperature
1/3 cup butter, melted
1 tsp salt
1/2 cup sugar
4 1/2 cups flour

filling..
1 cup brown sugar, packed
2 1/2 tbsp cinnamon
1/3 cup butter, softened

icing..
3 oz (6 tbsp) cream cheese
1/4 cup butter, softened
1 1/2 cups confectioner's sugar
1/2 tsp vanilla extract
1/8 tsp salt


Dissolve yeast in warm milk in a mixing bowl. Add sugar, butter, eggs, and salt. Mix. Add flour. Knead dough until smooth and elastic. Place dough in a lightly greased bowl and cover with a clean tea towel. Place somewhere warm and let rise until doubled (about an hour).
Mix butter, brown sugar, and cinnamon in a bowl until mixture is combined and crumbly. Roll out dough on a floured surface and spread/sprinkle filling on top, getting as close to the edges as possible. Roll the dough up lengthwise and cut into 12 equal slices. Place each slice into a greased baking pan. Cover with a tea towel and let rise again for a half hour.
Preheat oven to 400F. Combine cream cheese, butter, confectioner's sugar, salt, and vanilla in a bowl. Mix until creamy and smooth. Bake cinnamon buns in preheated oven for 15-20 minutes, until tops are golden brown.
While cinnamon buns are still warm, spread icing on top so it can melt. Cut one out and enjoy.


Delish.

Monday, November 29, 2010

letterpress cookies


This holiday weekend was just what I needed. Lots of delicious leftovers, fun with friends and family, and finally starting to decorate for Christmas. I also got an early Christmas gift from Charlie's mom. She found these awesome cookie cutters at Williams-Sonoma.


She knows about my decorating ambitions and thought this would help out. It'll be a nice addition to the cookie mix and perfect to use with new sugar cookie recipe I tried for Thanksgiving.


What's awesome about these cutters is not only the cute shapes, but the little letters you slide into them. It's like letterpress for baking!


They have some pre-made words so you can easily imprint "Happy Holidays", "Merry Christmas", and a few other phrases.


I was impressed at how many of each letter they include. There are varying numbers of each, depending on how common the letter is. I was surprised I could actually spell out my little blog title in its entirety, considering there are about 45 n's and 22 e's in the name. Give or take. :)


I might just have to make some tenpenny cookies this year! I was thinking these would also be good to use for one of those dough ornament recipes. You know the ones that harden and stay "fresh", so to speak, forever? Something like this. A little flour, a pinch of salt, a dash of varnish..


Then you could make cute messages for friends and family that they can keep and look at every year!

Another fun thing this weekend was date night. Charlie and I hadn't had a real, out on the town, date night in a while, so on Sunday we did it up right. He surprised me with tickets to White Christmas which is without a doubt my favorite Christmas movie.


While I longed to see Bing Crosby and Danny Kay singing and tap dancing up there, it was an amazing show. I had a blast, singing all the songs in my head and wishing I still danced. The plot varied slightly from the movie but I pretty much expected that. I really need to watch that movie soon. After the show, we went out to dinner at Jones. It's basically Steven Starr's home-style restaurant. It's all cozy with candles and fireplaces and most of the food on the menu is comfort food. So good.


I hope everyone else had a great holiday weekend! Is anyone as excited as I am that it is now officially Christmastime? Yay!

Friday, November 26, 2010

turkey day


I woke up yesterday to an unexpected surprise. It was snowing! We didn't have much of a white Thanksgiving or anything because it started raining soon after. But it was nice to see the snow and all the little frozen drops of water on the tree outside of my window when I first woke up.


Today I write to you from the warmth of my living room, dressed in flannel and leggings, and sipping hazelnut coffee. You won't find me out shopping today, no sir. I do not have the patience or aggressiveness to shop on such a day as Black Friday. It doesn't take much for a crowd to annoy me, be it by walking ridiculously slow or by having no self awareness and blocking everything. Most of the time, (not all of the time) I am too worried about being a jerk to react to obnoxious people so I just silently rage inside my own body. And that's just not a fun time for me so I avoid these situations at all costs. So here I sit happily, shopping from my computer, not wanting to punch anyone :).


The night before Thanksgiving, Charlie and I cut out dozens and dozens of cookies, baked them, and decorated. I had this whole grand plan of making up my own icing and doing that fancy border and flood thing that all the kids are doing these days but once I looked at all of the cookies all over my kitchen and dining room tables I almost fell on the floor. It suddenly hit me that I was exhausted from being up since 5am and baking pretty much all day. I made a beeline for the kitchen cabinet with the ready-made icing in it that we used for gingerbread cookies before, and grabbed two tubes.


I'll try the homemade icing for Christmas cookies. My mom and I will be marathon baking within the next few weeks so I'll probably have more patience when things are stretched over time and not all in one day. It's one of those crafty things I want to master that I have yet to try.

Charlie opted for an icing/sprinkles combo because he liked to make cookies that looked like pop-tarts.


I think they turned out pretty good for having tube icing and zero fine motor skills left in my body ;).


To illustrate my sad, sad state, here I am clutching an armful of tupperware, staring down at all the lids and canisters that just toppled out of the cabinet behind me.


Shortly after, we were watching The Santa Clause with a rum and coke and all was right with the world.


The next morning I woke up, decided I was Superwoman and started whipping cream by hand.


About 10 hours later (or so it felt) I found myself longingly staring at the mixer a few feet away. The only reason I didn't start with it in the first place is because it's not used often so it's sort of barricaded behind other kitchen things. I immediately dropped the whisk and pulled the thing out. Cream, sugar, and vanilla in and within a few minutes, I had whipped cream.


I may have whipped it a little stiff because I was paranoid about it being too soft and melting on the way to my aunt's house but it tasted great so I was satisfied.


Everything ended up being a hit. There were only two pieces of the pie left (one of which my brother ate as soon as we got home) and a lot of the cookies were snatched up and taken home. I'm really glad I tried these recipes. There will definitely be a repeat of the pie for Christmas.


I hope everyone had a great Thanksgiving and had lots of good food with friends and family! Have a great weekend! Now it's time for Christmas decorations..

Wednesday, November 24, 2010

thanksgiving eve


A little bit of a late post today. I've been busy tearing apart the kitchen and putting it back together. And from that I have a bunch of works in progress to share. The pile above contains some half done scarves. I need more of the green and blue yarn and I have to see where the rest of that mustard yellow takes me. I've just been blasting through those scarves, picking up a ball of yarn and a hook every time I sit. It's so mindless, I can just watch Elf and drink hot chocolate and suddenly, I'm at the end of a skein. :)

My first food related w.i.p. I started in the wee hours of the morning. I made up this sugar cookie dough to try something different this year. I figure if it's good enough for Sprinkle Bakes, It's good enough for me. The boyfriend and I will be baking and decorating them later tonight, after the dough is done chilling.


The dough is all packaged up and waiting patiently in the fridge..


Then I started making the gingersnap crust for this pumpkin cream pie I really wanted to try.


Those are some tough cookies to smash! I tried the usual method of cookie crushing and attempted to roll them out with a rolling pin but no dice. After rolling, pounding, pleading, and hammering. I crumpled into a pile of defeat. Then I remembered my Magic Bullet. I don't know if it is meant for things like cookies since I've only ever used it for smoothies but I broke them apart and gave em a quick spin and I had cookie crumbs in no time. I'm asking for a food processor for Christmas ;).

So that went in the oven and back out to cool. Then I started on the filling. I was so afraid to screw this up. My bad listening skills got me at one point and I poured in all the sugar in a part where you're supposed to split half into the pot and half into a bowl with egg yolks and corn starch. I had a mini panic attack and evaluated the amount of whole milk I had left and decided there wasn't enough to start over. Thankfully, these two mixtures get combined so I decided it would all be alright since the proper amount of sugar ended up in it, just in the wrong order. Baking is one of those things where you don't mess with the order and amounts of things. Cooking gives you a little more freedom with that.


I tasted the filling since I've never made this and am bringing it to a family dinner tomorrow just to make sure it wasn't a disaster. It was delicious. So good. I had to stop myself from eating it. Definitely make this. It is a nice change from your typical pumpkin pie but still satisfies your craving for all of those pumpkin-y flavors. And the milk and spice mixture smells fantastic while it's simmering. Amazing.

Here is the assembled pie on its way to the fridge to set. I'm going to make up the fresh whipped cream tomorrow before I leave so this isn't totally done yet. Check out the link above though if you want to see a complete one on shutterbean.


Both recipes are linked above but here they are again for convenience..


Sugar Cookies
recipe from Sprinkle Bakes

3 sticks of softened (but stilled slightly chilled, not room temp.) butter
4 eggs
2 cups sugar
1 tbsp vanilla extract
5 cups flour
2 tsp baking powder
1 tsp salt

Either get your mixer with paddle attachment or best mixing spoon (I've been doing the latter since I was little so I didn't bother dragging out the mixer.) and cream butter and sugar until mixed well. Add eggs one at a time and vanilla and mix until thoroughly combined. Mix flour, baking powder, and salt in a separate bowl and slowly add a little at a time to wet mixture, mixing until all ingredients come together to form a stiff dough.
Chill over night.
Preheat oven to 400F. Divide dough in half when you start to use it and keep half in the fridge so it doesn't get to soft. Roll out dough 1/4-1/2 inch thick on a floured surface. Cut shapes with your favorite cutters and bake for 7-9 minutes.
When completely cook, decorate as you please.


Pumpkin Cream Pie
recipe from shutterbean

Gingersnap Crust..
1 1/2 cups ground gingersnaps (I needed about 23 cookies.. it depends on the size of yours.)
2 tbsp sugar
5 tbsp melted salted butter, slightly cooled

Pumpkin Cream Filling..
2 cups whole milk
1 tsp vanilla extract
1/2 tsp ground cinnamon
1/2 tsp ground nutmeg
pinch of ground cloves
1/2 cup of sugar (divided)
pinch of salt
4 egg yolks
1/4 cup cornstarch
1 1/4 cup solid-pack pumpkin puree
1 tbsp salted butter

*I didn't add the candied pecans but if you're interested in adding those, hop on over there to see how it's done.

Preheat oven to 350F. Mix crushed gingersnaps with sugar and butter. Spread the mixture into a 9in pie pan. Make sure to press them up the sides and over the lip of the pan. Bake for 15 minutes and allow to cool.
In a saucepan, bring milk, vanilla, cinnamon, nutmeg, cloves, 1/4 cup sugar, and salt to a simmer over medium heat.
In a bowl, mix four egg yolks with 1/4 cup corn starch and 1/4 cup sugar. Slowly pour milk and spice mixture into the bowl with the eggs, whisking constantly. When that is all combined, pour back into saucepan and bring to a simmer over medium heat, whisking constantly. When it is bubbling in the center, remove from heat and stir in pumpkin and melted butter.
Push mixture through a sieve to remove (some) lumps. Pour filling into crust and spread with a spatula. Let pie set in the fridge for at least four hours. Top with freshly whipped cream. I'll be using the whipped cream recipe below because it supposedly keeps longs with sugar in it.


Fresh Whipped Cream..
1 cup heavy cream
1 tsp fine sugar
1/2 tsp vanilla extract

Whip cream until it becomes fluffy. Gently fold in sugar and vanilla and adjust sweetness to taste. Continue mixing until the cream forms soft peaks.


Whew. I hope everyone's cooking and preparing is going well. I'll be taking off tomorrow to spend time with family but I'll be back on Friday with decorated cookie results and maybe a finished pie shot if I remember!

Happy Thanksgiving!!

Tuesday, November 23, 2010

crack dip


Yes, you read right. Crack dip. I didn't even know it was called that until after about my third time having it. Apparently it has been dubbed "crack dip" because it's just that addictive. What it is referring to is actually buffalo chicken dip. And it is quite addictive.

This is a super easy appetizer to whip up. It takes about a half hour to throw together from start to finish. And that's including 20 minutes in the oven. Someone usually always brings it to family gatherings which is why I've had it numerous times and will probably have it in the weeks coming up. I made it over the weekend for a football party (go Eagles!!).

It includes very basic ingredients and if you just cook up extra chicken when you make it for dinner one night, a lot of the work is already done for you. The only thing I have to say is that people are very insistent that you must use Frank's hot sauce. I've looked at several recipes just to see the subtle variations of ingredients and everyone makes it a point to mention that you have to use Frank's. Now I'm no hot sauce connoisseur (in fact I usually steer clear of spicy things but I make an exception for this dip) but who am I to doubt all these people's opinions? And it's delicious so I guess it works!

So you want to gather up your precooked, shredded chicken, Frank's hot sauce, cream cheese, and shredded cheddar.


Dump it all in a bowl and mix until it's well combined.


Pour this into a baking dish and top with a little more cheddar.


Bake it in the oven until it's all bubbly and heated through.


Crack Dip aka Buffalo Chicken Dip

3-4 precooked, shredded chicken breasts
1 8oz package cream cheese
1 12oz bottle Frank's Hot Sauce (Buffalo)
2 cups shredded cheddar (+more for top)


Preheat oven to 350F. Combine all ingredients in a bowl and mix until well combined. Pour into a baking dish and top with another handful of shredded cheddar. Bake for 20 minutes or until heated all the way through.

Serve warm with crackers or sliced french bread.

Become a dip fiend but try to save room for dinner :)

Monday, November 22, 2010

pesto buns


To be honest, I didn't even know what pesto was until my boyfriend. He is a pesto fiend and now, thanks to him, I am too. As a snack we would sometimes get a tub of pesto and a baguette from the market and just go to town on it until there was no more pesto. Anytime I see a pesto recipe I have to try it and I know who my best judge will be.

I tried a pesto swirl bread before and while it was delicious, it pales in comparison to these. I was going to make the bread again for when we hung out this weekend but I wanted something that felt a little more snackish than just chomping down on a loaf of bread. Since these are sort of like individual servings of pesto muffins so to speak, I thought they'd be perfect. They were. The texture is so tender and it had the perfect pesto to bread ratio. Charlie said they reminded him of a sort of savory cinnamon bun which is why I'm calling them pesto buns.

So if you're like me and prefer savory over sweet any day, these make the perfect snack. If you're a normal person then just make them with dinner and they'll be the perfect side :).

Start by putting all of your liquids and sugar into a mixing bowl.


Dump all your dry ingredients on top.


Get in there with some clean hands and knead until it turns into a smooth dough.


After it rises and doubles in size, roll it out flat on a floured surface. Spread all that pesto-y goodness on top. Don't be stingy with it!


Begin to roll the dough into a log and pinch the seam shut to close everything in. You may lose some pesto along the way but this just means you put enough in ;).


Cut the log into 12 equal slices.


Put each slice into a section of a greased muffin pan.


Bake in the oven and eat one warm. To die for.


Pesto Buns
adapted
slightly from Savory Sweet Life

1/2 cup warm water
1/2 cup warm milk
1 egg, room temp. and slightly beaten
1/2 cup butter, melted
2 tbsp sugar
1 tsp salt
4-5 cups flour (4 was perfect for me)
2 1/4 tsp (1 package) instant yeast
7 oz (just shy of a cup) pesto


Place water, milk, egg, butter, and sugar in bowl. Mix. Dump 4 cups of flour, salt, and yeast on top. Knead until you have a smooth, elastic dough. Add more flour as necessary. Put dough in a greased bowl and cover. Let sit somewhere warm for about an hour or until doubled in size. Roll out dough on a floured surface. Spread pesto on top. Roll dough into log and pinch seams closed. Cut log into 12 equal slices and put each into a section of a greased muffin tin. Let them sit, covered for about another 20 minutes. Preheat oven to 375F. Bake for 20 minutes or until golden brown. Let them cool but be sure to have one warm. Enjoy!


I can't believe it's already Thanksgiving week! November flew by. There will be lots of cooking this week in preparation for Thursday so I'll try to document some of that and share it with you. I saw a great dessert on shutterbean I'm planning on making. I'm sure most people will be exceptionally busy this week so I wish everyone luck in the kitchen and safe travels :).

Friday, November 19, 2010

gilmore anyone?


Any Gilmore Girls fans out here? If so, you may have known the answer to yesterday's question.. that infamous casserole, Johnny Machete.

I'm a bit of a Gilmore nerd and have seen each episode multiple times since I have the dvd's. In one episode, this mystery casserole is served at the traditional Friday night dinner because it was a childhood favorite of Richard's. Emily is less than pleased with this dish and is not afraid to let everyone know it.

Because it has such a curious name I was determined to find out what exactly it was. It was really hard to find any answers but finally, I found another blogger with the same affinity for The Girls that I have. She was able to uncover a lot of information on the subject. Apparently it is unclear exactly where they got the name "Johnny Machete" from, maybe a play on childhood misspeaking, but the dish is believed to be based off of the casserole, Johnny Marzetti. According to The Kitchen Illiterate, Johnny Marzetti is something Ohioans know about. It comes from a restaurant in the 1920s named Marzetti's and is sort of like a super Hamburger Helper.

I was a little skeptical about the combination of ingredients but I was determined to try it after finally finding it. I mean, if it was awful, there's always take out right? :) But let me just tell you, it was awesome. It will definitely be made again. My family and boyfriend loved it and there's plenty of it to go around. So whether you Gilmore or not, try this recipe. You won't be sorry!

Begin by chopping up some mushrooms, celery, green bell pepper, onion, and garlic.


Get some butter and olive oil heating in a large pan and add your mushrooms. Coat them and let them sit for about 5 minutes, flipping once during that time. Remove them and put aside and start browning your ground beef.


When the beef is browned about half way, add all your veggies including the mushrooms.


Cook until meat is browned all the way through and onions become soft and translucent. (After the meat was cooked through I covered it with a lid to let the veggies steam a little.)


Meanwhile you should have pasta cooking in a large soup pot. Very large. Everything is going to end up in here. When it's just slightly undercooked, strain it and return it to the pot. Add both tomato and cream of mushroom soup (that's the part that made me nervous) and dill.


Mix well until everything is combined. Next add your cheeses.


I put the meat mixture right on top of this to try to get it to start melting before I had to mix everything. It helps to transfer the meat and veg mixture with a slotted spatula or spoon so that you leave all the juices from the meat and vegetables behind.


Now mix everything. Get it all good and coated. This is where you'll be glad to have a large pot. It should look like this when you're done..


Now pour the whole lot into a large baking dish and cover with remaining cheese. Oven time.


After a half hour, you will have this..


Scoop out a section and eat up. With all the flavors and fresh vegetables, this puts Hamburger Helper to shame.


I have to agree with Richard on this one. Delicious. Johnny Marzetti or not, I think I will always call this Johnny Machete. It makes it sound much more interesting! My dad thinks it sounds like a mob boss or a cheap cocktail. And what's more interesting than that? :)


Johnny Machete
adapted slightly from The Kitchen Illiterate

16 oz (or 1 box) pasta (I used rotini because it holds all that cheesey goodness in its spirals so well.)
1 tbsp butter
1 tbsp olive oil
5 oz mushrooms, sliced
1 lb ground beef
1/2 green bell pepper, chopped
1/2 onion, diced
2 sticks celery, chopped
2 cloves garlic, minced
1 10 oz can condensed tomato soup
1 10 oz can condensed cream of mushroom soup
1 tsp dill
1 cup mozzarella cheese
1 cup cheddar cheese

Preheat oven to 350F. Cook pasta for about 8 minutes or until just undercooked
Heat butter and olive oil in a large pan. Add mushrooms and coat. Cook for five minutes flipping once. Remove mushrooms and set aside.
Add ground beef to pan. Cook about halfway through and add garlic, pepper, mushrooms, celery, and onions. Cook beef all the way through and heat until onions are translucent.
Add tomato and cream of mushroom soups and dill to pasta. Mix well.
Layer 3/4 cup each of cheddar and mozzarella cheese on top of pasta.
Scoop beef and veggie mixture on top of that.
Mix everything until it is evenly coated and combined.
Pour the mix into a large baking dish. Top with remaining cheeses.
Tent loosely with foil and put in the oven for 30 minutes. When there's about 5 minutes left, remove foil so cheese gets a little bubbly and slightly browned.
Serve it up and decide if you are a Richard or an Emily.


Happy Friday! :)
Related Posts Plugin for WordPress, Blogger...