nav bar


Showing posts with label make. Show all posts

Friday, June 8, 2012

yarn juice

This is not spaghetti.


Even though that's what everyone who walked into the kitchen thought. I have some free time before I have to start my next project for class so I thought I'd tick some things off my crafty to-do list. One being kool-aid yarn dying! You may remember this post.


I can't wait to try other colors. I just have to unravel a few more skeins first. For my first project, I'm creating a color palette of the general kitchen decor to make a woven yarn rug. This flavor color is mango. As you can see the water is pretty much clear and all the color is absorbed into the yarn. Fun!


In the shot above you get a good idea of the original color vs. the kool-aid color. I need to pick up a few more packs now that I have a project in mind. I just grabbed these at random at the market one day so I'd have something to start with.

What projects are you tackling these days?

Have a great weekend!!
post signature

Wednesday, April 4, 2012

light crochet

Before I get into today's ideas and inspirations, I just want to share a little exciting news! Well, exciting to me. :) Yesterday, after four very long weeks of waiting, I finally got the scores of the two Praxis tests I took back to back - and I passed! Both of them! This is crazy good news because now all I have to do to finish my certification is take my two summer classes and student teach. Then I will be officially able to teach in PA. I was so stressed out that I wouldn't pass and then I'd be even more stressed retaking them, plus the fact that it costs a pretty penny. This is such a weight off my shoulders I can't even truly express it in words! If you could see me I'd show you my happy running windmill dance I did through the house to get to my coffee after I found my scores yesterday. :)

Anyway.

The idea of warm weather is starting to sink into my bones and even my craft mentality is taking a cue. I haven't crocheted anything in a while and I've got the urge to pick up some yarn so I went through my inspiration folder to find some spring and summer appropriate crochet projects. The lightness of the stitches, the uses, and color palettes are what make me think of warm weather when I see these projects.


1 The yarn takes on an airy net-like structure in this beautiful crocheted market bag. I'd love to whip up a few of these and take them on a trip to a farmers market or take one to the beach! [source + more found here]

2 These gorgeous place mats from the Purl Bee look like they belong on a wooden picnic table, surrounded by melting drinks and a summer fruit salad. I absolutely love the color palette they used. [source]

3 I really want to try to make one of these woven hula hoop rugs. In this tutorial, it is made with yard after yard of finger knitting. This project isn't exclusive to warm weather but I'm embracing anything that isn't a scarf or sweater or mittens right now. :) [source]

4 I love this little crocheted cuff. The stitch looks so complex but once it's broken down it seems totally doable. I love it in the earthy tone.. the perfect natural looking accessory for time spent outside. [source + a great tutorial]

5 I saw this cute beach cover-up on the Free People site last summer (which unfortunately means the source no longer exists) but I had one of those "hey, maybe I could make that" moments. It looks like a bunch of doilies linked together with a net-like stitch. I might try to make my own variation for this summer. Speaking of Free People and crochet, have you seen their new catalogue? It's packed with crocheted items.. more than I would have thought possible for this time of year! It's great to look at. Check it.


Well I hope your month is starting off well! What projects are on you list for the warm seasons?
post signature

Wednesday, March 28, 2012

paper mache bowls: how-to


Just wanted to put together a little how-to for anyone wondering how I made these. It's super simple and I'm sure there's a million ways to do it but this is how I did!

First, grab some balloons and blow them up to the size that you want your bowls. Then tear up some newspaper (in hindsight I would make the pieces smaller - they'll lay flatter and minimize bumps and wrinkles!) and start mod podging it to your balloon. I just dipped my brush straight into the bottle, painted some on the balloon, and stuck down the first piece of paper. Then I brushed over that and kept sticking pieces of paper on until the balloon was almost half covered. Make sure all of the paper is covered in mod podge.

 
If you make the bowl bigger than you want it, you can cut the edge off later to the size you want, which will ensure that the edge is even and thick.

After going for a while, hold your balloon up to a light and check for thin spots where the light shines through. Cover these spots with more paper until you can no longer see light through it. I think my whole balloon was about four layers thick, at least.


When you're satisfied by the paper coverage, hang your balloon to dry by the little nub on top. I just clipped mine to a clothesline. I let it dry overnight so it would be nice and firm when I went to paint it.

So when your balloons are nice and set, grab some painting supplies!


I thought it would be easiest to just hold the balloon while I painted the paper so I left it inflated. It took about three coats before all the newspaper was hidden so I just hung the balloons on the clothesline in between layers. They dried pretty quickly.


When the paint is dry, pop the balloon! I cut the top off so it wouldn't just burst but deflate quickly. I wasn't sure if the bursting would tear it. Just help the balloon along as it deflates and unsticks to the paper.


Next, I leveled off the tops and just trimmed until the bowl had the depth that I wanted.


After that, paint the inside of the bowl whatever color you want. You can see the first gold layer of my little bowly in the back!

Once the inside is dry, you're done! Easy as that.

Click to see the finished bowls. :)

Hope you're having a great week!
post signature

Friday, March 23, 2012

paper mache bowls


At some point in my scrolling through the internets I saw these really fun wooden bowls that were painted white on the outside and gold on the inside. I wish I remembered where they were from because I can't for the life of me now, but anyway, I thought I had this ingenious idea of recreating them with paper mache. I really liked them and thought "hey I can do that myself on the cheap!"


Apparently I wasn't that original because it only took some random browsing on Pinterest to see that a few people had already done just that. :| Oh well, I was still proud of myself for coming up with the idea in the first place, even if it wasn't that hard to think of. ;)


I'll do a post on my process next week, otherwise this post would be a little photo heavy because I took advantage of the beautiful day and shot some bowly glamour shots outside. One of those times as a blogger that you picture every neighbor peeking out their window, wondering why you are laying in the grass taking pictures of some odd colored bowls. :)


As you can see, I ditched the white in favor of a springy melon color just to jazz things up a bit. Though I will probably still make the white ones one day as I improve my mache-ing skills. These bowls are a lil lumpy but I love them all the same. Believe it or not, this was my first time doing paper mache. Never got to make one of those weird masks or vases in elementary school art class or anything so I just rolled with what I knew! It's not really rocket science, but alas, there are ways to do it and there are better ways to do it.

Have a great weekend! Hope you're getting the same lovely weather we have!
post signature

Thursday, December 1, 2011

handmade ornaments


In the crafty holiday post I mentioned some ornaments I made in my high school art class. I thought I 'd share them with you as one idea for how you can go about making your own decorative Christmas balls for your tree or to hang anywhere really. I may do a full-on tutorial later but I don't have the supplies at the moment. I'm also in the midst of finals so if I'm absent any the next few days, that's why. My last class is next week so I won't be silent for too long. :)

We took foam balls, covered them in bits of tissue paper with a glue wash, and painted images from Christmas cards onto them. They were displayed on our school's Christmas tree and then we took them home afterward.

We painted them with acrylic paints and used glitter and fabric remnants to decorate them. On the blue one, I used a paper doily as a stencil and painted metallic silver paint over it to give it a fun pattern.

On the red and gold one I wrapped a piece of lacy trim around it to separate the colors. I topped them both off with a big lacy bow and a hook for hanging!


Anyway, they're no masterpieces but I love unwrapping them every year when we decorate the tree because it reminds me of fun times. I really loved my art class in high school. It was stress free and fun. And then there's art school. Just kidding. ;)

Now I have to finish putting together my activity for class tonight. I have to do a 2nd grade math activity with my grad school class. I kind of love being an elementary ed major. :)

Hope your week is going well!

Thursday, September 22, 2011

dublin doors


One time I told you about my new found love of water colors. I still have yet to show that finished project.. whoops. Recently, a friend and I were having a crafty conversation over lunch and I told her about this. She then asked if I'd be interested in doing a project for her. Her parents had photos of the famous Dublin doors from their trip to Ireland and her dad had always wanted to get someone to paint a few. She asked if I would pick any three and paint them for her to give to her dad for his birthday.


It took me a while to do because I've never really given my art to anyone outside of the family so I was a little stressed out. You always here about those people who have a painting from a friend of theirs hanging on their wall strictly out of obligation to their friend, even though they secretly loathe it. I really didn't want to be the person to make someone have feelings of malice towards one of their walls every time they passed it. :/


But I told myself to get over it and got them done. I actually ended up having a lot of fun doing them and really like the end result. (I just hope they do too!) I've been feeling super inspired lately now that I've been making instead of just looking. I've been experimenting with painting, jewelry making, sewing, and crocheting and I think I've got a few good things coming out of it!


I talked about creative constipation (cute, I know) in a post before and now I know the cure.. make. Just make anything. Experiment with something you've been wanting to try or go to an old standby craft that you know well. It's just so easy to get bogged down by all of the beautiful inspiration on Pinterest and other blogs these days. Sometimes I think I can actually feel the pressure in my head from too many ideas. Eventually you just have to let some out. :)

Happy almost Friday!

Tuesday, September 13, 2011

pumpkin pie spiced coffee

Now that I've become a seasoned a pro at making iced coffee this summer (aka for a whole month now), I figured it was time to try out my french press for the purpose it was intended.. hot coffee. Charlie and I went for a walk the other day around our favorite town and got our first fall drinks of the season in the form of Pumpkin Spice Chai. Delicious. And ever since I've been craving those fall flavors. So I decided to do a little experiment to see if I could make my own fall in a cup!


Adding spices to coffee is nothing new, but I figured I'd show you what I did in case you've been looking for a way to spice up your morning brew. I was about to get out the usual spices that create that pumpkin pie taste, when I saw that we actually had Pumpkin Pie Spice in the cabinet from last year! If ya got it, use it. Otherwise make up a mixture of cinnamon, nutmeg, ginger, and allspice. That's exactly what's in this stuff.

As for how much of the mix to use, that depends on how much you're making and how strong you want the flavor to be. After doing a little research on how much of a spice you should add to coffee, the consensus seemed to be a "pinch". And according to my measuring spoons, a pinch equals 1/8 tsp..

Handy!


My press makes eight cups so I put a rather heaping pinch. I decided I would rather err on the side of too much flavor and adjust later than not be able to taste it at all. For me this was the perfect amount. And since I'm the only one drinking it, I popped the rest in the fridge so I can try it iced later. Oh yes.


Put the spice right in with the grounds so that everything is intensifying together. Pour the boiling water like usual and follow the directions for your press. Add your favorite sweetener and milk and enjoy fall. (read: sit by an open window with a fan on and pretend the weather isn't still going for summer.) ;)


I don't think I've ever been so desperate for fall to get here. I'm just tired of sweating and I'm ready for those hearty, cold weather dinners. Mmm.


Pumpkin Pie Spice
large amount from All Recipes, small amount from Southern Food

to make a container for use throughout the season..
4 tbsp cinnamon
4 tsp nutmeg
4 tsp ginger
3 tsp allspice

to make a tsp worth..
1/2 tsp cinnamon
1/4 tsp nutmeg
1/8 tsp ginger
1/8 tsp allspice

Mix and store in an airtight container.

Tuesday, August 9, 2011

french pressed iced coffee


I pretty much bought a french press for the soul purpose of making iced coffee. I saw this post on The Bitten Word and thought, "I need this immediately!" and went out and bought one the next day. I love me some iced coffee in the summer but I drink it other times during the year too. There's nothing like a steaming hot latte to warm your bones on a cold winter day, but sometimes I want coffee and something refreshing no matter what the temperature is, so I'll opt for an iced coffee instead. Thus, good investment. Not to mention the fact that you can obviously make hot coffee with it too.

I added four cups of water to the press and half a cup of ground coffee. (Adjust to your likings.)

Mix it up!


Watch the grounds swirl..

Get the lid on but don't push the plunger down! Clear some space in the fridge for your new best friend and slide 'em in.

Now leave it alone! After seeing a few iced coffee recipes, it seems like the recommended time is to let it sit from 8 hours to overnight. I did overnight.

In the morning, take out the press and push the plunger down slowly. Add ice to a glass and fill with coffee, milk, and your favorite sweetener. I want to try making flavored coffee sometime too. Yum!


It was amazing. Delish iced coffee for way less than you'd pay if you got it out. I can't tell you how excited I am that I have a french press full of iced coffee sitting in my fridge right now. It makes a decent amount too!

Before I wrap this up, I have a question for those of you who own french presses. On the instructions that came with the press it says to only use coarse ground coffee. When I went to the store I saw coffee labeled fine ground, extra fine ground, and the rest had no specification at all. I gave up after standing in the coffee aisle for an awkwardly long time and just grabbed one with no specific ground cause I assumed that would be "regular". This lead me to look into coffee grinders but the only ones that allow you to choose the ground size are the super expensive ones. So my question is.. is it good enough to just use the regular, not fine ground coffee? Or do I need to put out the money to get a coarse grind? The one I used for this seemed to strain just fine but I don't want to screw up my filter, ya know?

Have a great week!

Tuesday, August 2, 2011

water color fun

I can safely say I haven't touched water colors since high school art class. But I think I have just found a new love for them.


See, what happened was, I decided it'd be a great idea for Charlie and I to make anniversary presents for each other this year. We started dating five years ago this past July 7th and I thought we should honor the date by exchanging something special. And since I'm flat broke and he has a tight budget now that he has a new apartment, making something seemed to make sense.


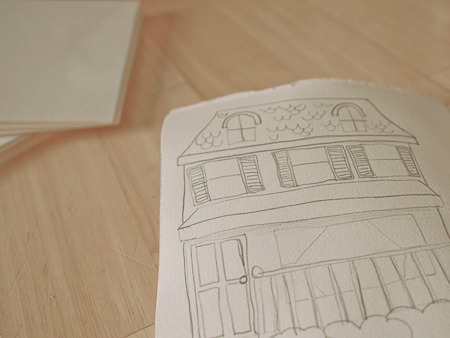
From the beginning I knew I wanted to make a book. I really like bookbinding and have gotten better at it since binding all the books for my senior project (nightmare). The only thing I didn't know was what the book was going to contain. I originally thought of some sort of scrap book of things I've collected over the years but couldn't find a good way to go about it. Then I thought of just photos with text. The thought of full bleed photos with text on top bored me to tears though. Then I had the brilliant idea of combining my first two ideas and taking polaroid photos and then sewing them onto the pages combined with text to give it a more scrapbooky feel.

That was my favorite idea. Until I looked up the price of polaroid film. *facepalm*


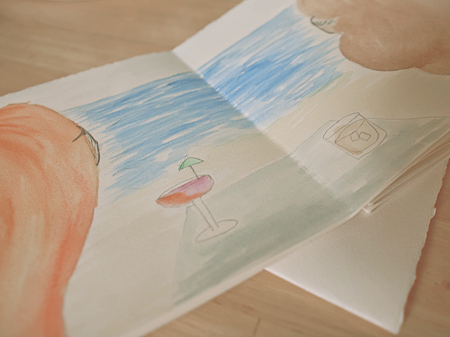
When I figured out I could just get him a nice gift for the couple hundred dollars the film would've cost, I realized it was time for a new plan. I decided to illustrate the book. This doesn't seem like a problem unless you know how I feel about drawing. I actually do love it, I'm just no good at it. And I totally admire people that are good at it. I'm actually going to save that for another post though because I have too many opinions and complaints for this already growing post. But I'll try to keep it witty and lighthearted, I promise. ;)


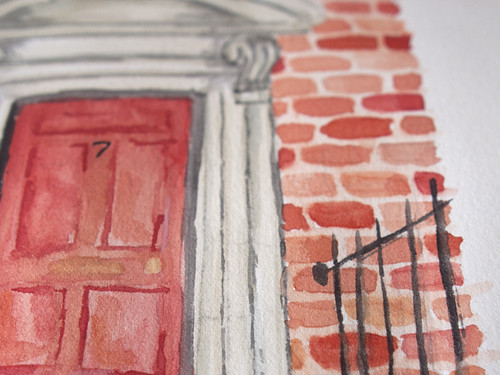
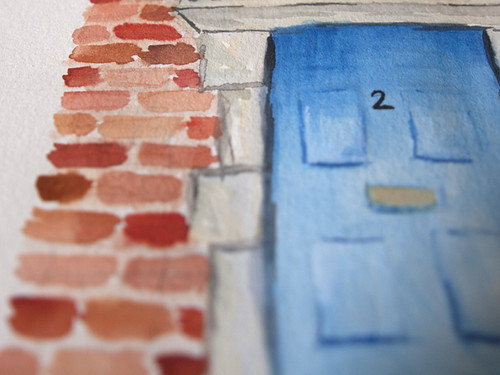
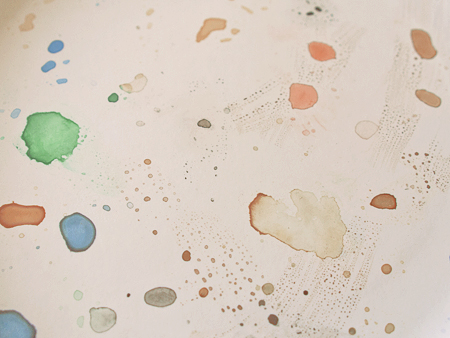
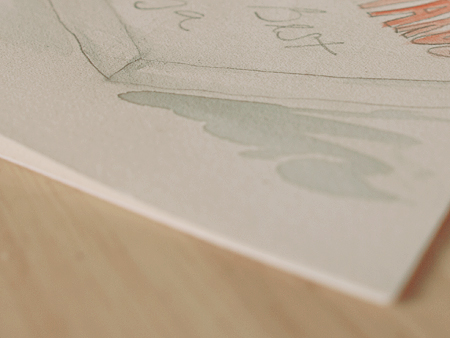
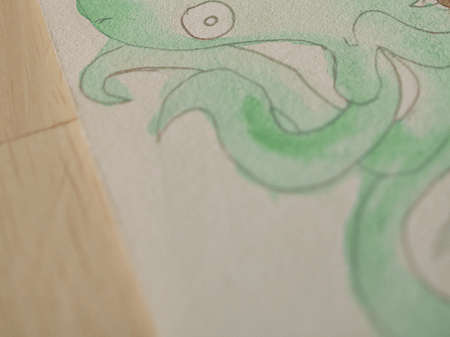
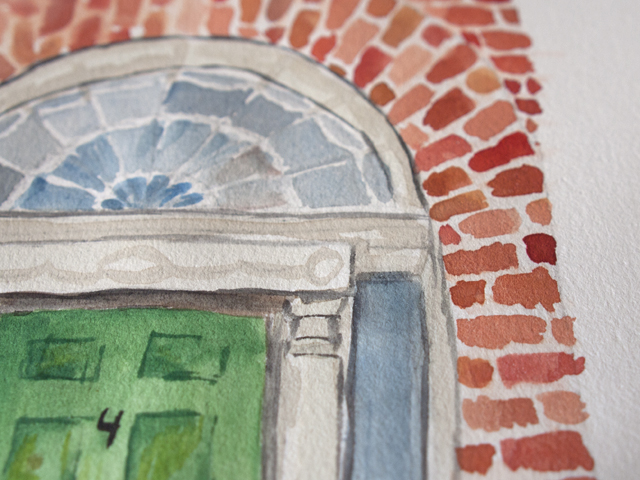
So, as I will explain in my I Hate Drawing post, I have big issues with letting loose when it comes to drawing, and not being a totally anal retentive perfectionist. I think I'm getting better at letting go though, and the water colors helped. I've always liked painting because it's not so precise. Unless you're one of those people who makes paintings that look like photos. Which I am not. So I just told myself I'd do a simple sketch of the illustration I wanted and then have fun painting it up.


So far it's coming out pretty much the way I wanted it to. It's very relaxing and mistakes are easily fixed with a few more brushstrokes. It's nothing museum-worthy, but it's exactly what I wanted. Fun, pretty, and easy. We're obviously a little late on exchanging the gifts but I'd rather take the time to do it right than worry about deadlines. It'll kind of be like having a second celebration anyway! :)


So what have you made for special people in your lives? I need more ideas because I do love making things for people. Any inspiration is greatly welcome. :)

Have a great week!

Friday, April 22, 2011

fun finds: easter

I've been finding a lot of fun Easter and Spring related things that I wanted to share with you. Here are my favorite projects from around the interwebs!

These eggs are real eggs shells filled with chocolate! The tutorial I'm linking to from Not Martha is pretty fun because it shows you how to just coat the insides of the eggs with chocolate and then stuff them full of Easter goodness. I made these before but we filled them with different colored white chocolate so that when we cracked the shells open, rainbow colored solid chocolate eggs popped out!

{source}


Here's another fun thing to do with empty eggshells. When you crack eggs for your Easter baking, don't discard the shells. Put them back in the carton. When the carton is full of shells, start a little herb garden!

{source}


Here's a little spin on classic dyed Easter eggs. Southern Living has a tutorial that uses some paint and a toothbrush to make some rustic speckled eggs.

{source}


Switching over to bunnies, The Purl Bee has an awesome pattern and tutorial for these cute little buns. Grab your favorite patterned fabric and get sewing!

{source}


Another cute bunny pattern. This one is from mmmcrafts. These little baby buns kill me! Too much cuteness. Sew one of these up for a special little someone's Easter basket. It even has it's own baby blanket!

{source}

This last one you can keep up all Spring. I love cherry blossoms and this is a cute little tutorial that shows you how to make your own out of paper so they'll never wilt. This would make a really cute centerpiece. :)


I hope some of these have gotten your springy craft juices flowing. Click the source link to get to any of the tutorials. These projects would make perfect gifts or decorations!

Happy Friday everyone!

Thursday, April 21, 2011

bunny stamp


I decided to take a creative break between papers. There's only so long you can stare at a Word document before going crazy. So I decided to make another stamp! This one is Easter themed. I made my first one back in December for Christmas. I'm starting to get a nice woodland collection here. :) Maybe I'll do an owl for Halloween.


I made big bunny with a little one next to it.


I inked it up to see how it would print..


then cleaned it up a little bit after seeing things that printed that I didn't want to print.


I've got a little more work to do but it's coming along. I don't really hate the lines in the negative space. It kind of gives it that true hand carved feel. I just don't want too many because it's a small piece so I don't want the small image to be overwhelmed. This was a fun distraction though! I'm cooking dinner later which will also be a calming break for me and then it's back to papers.

I kind of forgot what it's like to do finals for normal classes instead of design classes. This time last year I would probably be on my second day without sleep and living in the main studio off of espresso drinks and whatever food was quick and portable. When I remembered to eat, that is. Oh art school, how I sometimes really don't miss you. I do miss your wonderful facilities though.

I can't believe it's Thursday. I didn't even realize I missed two days of posting! Eep! It happens. Hope your week is finishing up well!
Related Posts Plugin for WordPress, Blogger...